123bet là nhà cái cá cược trực tuyến uy tín hàng đầu châu Á. Tại đây người chơi sẽ được trải nghiệm nhiều dịch vụ cá cược trực tuyến hấp dẫn. Với dịch vụ thanh toán hiện đại và quy trình trả thưởng nghiêm ngặt, 123bet hiện đang là nhà cái giải trí trực tuyến được nhiều cược thủ mong đợi. Cùng xem bài viết sau đây và tìm hiểu chi tiết những sản phẩm cá cược tại 123bet.

Tổng quan thương hiệu 123bet
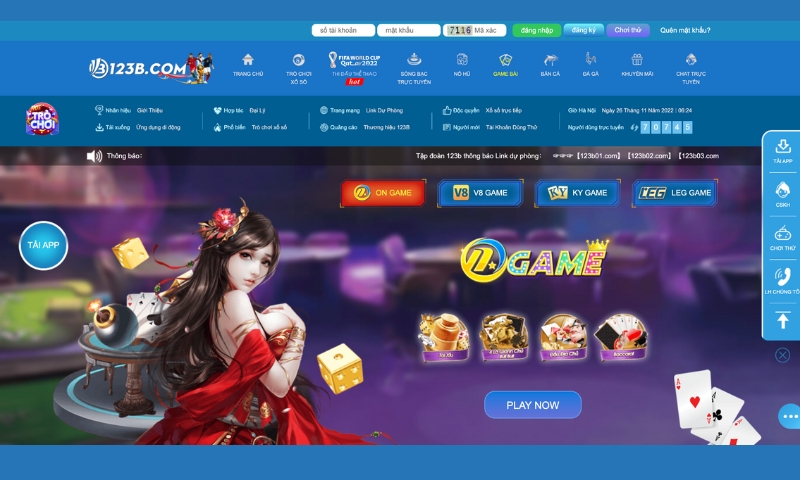
Nhà cái 123bet là thương hiệu đặt cược giải trí trực tuyến nổi tiếng tại Việt Nam. Nhà cái cung cấp đầy đủ những sản phẩm giải trí trực tuyến chất lượng như: xổ số trực tuyến, cá cược thể thao, game bài online, sòng bạc trực tuyến,…

123bet là thương hiệu đã được chứng nhận sòng cược trực tuyến hợp pháp bởi First Cagayan. Đây là công ty Cổ phần giải trí và nghỉ dưỡng trực thuộc Đặc khu kinh tế Cayagan – Philippines. Do đó, mọi hoạt động đặt cược tại 123bet đều được kiểm soát và theo dõi bởi Chính phủ Philippines.
Nhờ đó, người dùng hoàn toàn có thể yên tâm về các dịch vụ giải trí tại đây. 123bet mang đến các sản phẩm giải trí chất lượng với nội dung thu hút và tỷ lệ trả thưởng hấp dẫn. Đồng thời, quy trình trả thưởng tại đây cũng được kiểm soát gắt gao, chặt chẽ. Đảm bảo tính minh bạch và an toàn với mọi người chơi.
Ưu điểm nổi bật của thương hiệu 123bet
Hiện nay, nhà cái 123bet đang là địa chỉ giải trí trực tuyến được nhiều cược thủ săn đón. Hãy cùng tìm hiểu chi tiết những ưu điểm hàng đầu của thương hiệu này.
Nhà cái uy tín
123bet là thương hiệu đặt cược giải trí trực tuyến uy tín nhất thị trường. Nhà cái đã có hơn 10 năm thành lập và hoạt động trong lĩnh vực cung cấp dịch vụ giải trí trực tuyến. Ngoài ra, nhà cái đã có rất nhiều văn phòng đại diện tại khắp các quốc gia khu vực Châu Á. Với chứng nhận nhà cái hợp pháp từ First Cagayan, thương hiệu 123bet là địa chỉ uy tín được nhiều cược thủ lựa chọn tham gia.
Bảo mật tốt
123bet là một trong những nhà cái trang bị hệ thống bảo mật tốt nhất hiện nay. Thương hiệu cài đặt tường lửa đa tầng và bộ khoá kép SSL128bit. Đảm bảo thông tin khách hàng được bảo mật 100%. Không để xuất hiện tình trạng rò rỉ thông tin cho bất kỳ bên thứ 3 nào. Do đó mà người chơi hoàn toàn yên tâm khi tham gia đặt cược tại đây.

Giao diện website thân thiện
Website nhà cái 123bet được đánh giá là đẹp mắt, hiện đại và dễ dàng thao tác, sử dụng. Người chơi có thể dễ dàng tìm thấy thông tin cần biết ngay từ lần đầu truy cập nhờ bố cục danh mục nội dung khoa học.
Đồng thời, tốc độ tải trang cũng là một trong những ưu điểm của 123bet. Website hoạt động ổn định và không để xảy ra tình trạng giật, lag, rớt mạng. Không làm ảnh hướng đế trải nghiệm của các cược thủ.
Tỷ lệ trả thưởng cao
Hiện nay, 123bet đang là đơn vị cung cấp tỷ lệ trả thưởng cao nhất thị trường. Đây là một trong những ưu điểm hàng đầu giúp cho nhà cái ghi điểm trong lòng cược thủ. Với những cược thủ đã có kinh nghiệm, 123bet mang đến cơ hội làm giàu thần tốc cho các cược thủ.
Đa dạng khuyến mãi
Tham gia đặt cược online tại 123bet, người chơi không chỉ được trải nghiệm những tựa game hấp dẫn. Bên cạnh đó, bạn có thể nhanh chóng gia tăng thu nhập nhờ việc tham gia các chương trình khuyến mãi hấp dẫn:
- Khuyến mãi 100K dành cho mọi thành viên mới: Người chơi thực hiện tải về app 123bet, tiến hành đăng ký tài khoản thành viên và liên kết tài khoản ngân hàng. Ngay khi liên kết thành công, nhà cái tặng ngay 100K cho tân thủ.
- Khuyến mãi 1,5% giá trị thẻ nạp cho mỗi lần nạp thẻ: Chương trình áp dụng cho mọi thành viên tham gia đặt cược tại 123bet. Người chơi sẽ có cơ hội nhận được khuyến mãi từ 0.5 – 1,5% giá trị thẻ nạp thì nạp tiền đặt cược tại 123bet.
- Hoàn trả 1% mỗi ngày: Mọi thành viên đặt cược trực tuyến tại 123bet đều sẽ được hưởng chính sách khuyến mãi hoàn cược 1% trên tổng số tiền nạp.
- Tặng thưởng liên tục vào các dịp: sinh nhật khách hàng, quốc khánh, ngày lễ, tết và các sự kiện nổi bật trong năm của 123bet,…

Tham quan tổ hợp trò chơi trực tuyến hàng đầu nhà cái 123bet
Thương hiệu 123bet casino mang đến thị trường Việt Nam hàng loạt các sản phẩm game bài giải trí đình đám và hấp dẫn như:
Cá cược thể thao
Nhà cái 123bet mang đến cơ hội đặt cược thể thao đa dạng: cầu lông, bóng đá, bóng bàn, bóng chuyền, tennis, quyền anh,… Với từng bộ môn, nhà cái đều cập nhật các giải đấu lớn nhỏ khắp hành tinh. Nhà cái cung cấp kèo cược với tỷ lệ cá cược hấp dẫn gồm: kèo châu Âu, kèo châu Á, kèo Tài Xỉu, kèo 1/4,…
>> Xem thêm: Top nhà cái casino thể thao trực tuyến uy tín: mig8, dafabet, kubet, thabet, zbet
Game bài online
Cược thủ càng không thể bỏ qua các sảnh cược game bài online khi tham gia 123bet. Các trò chơi phổ biến tại đây gồm: Xì dách, Mậu binh, Bài cào, Sâm lốc, Liêng, Poker, Phỏm,… Chắc chắn sẽ không khiến các cược thủ phải thất vọng.
Xổ số lô đề
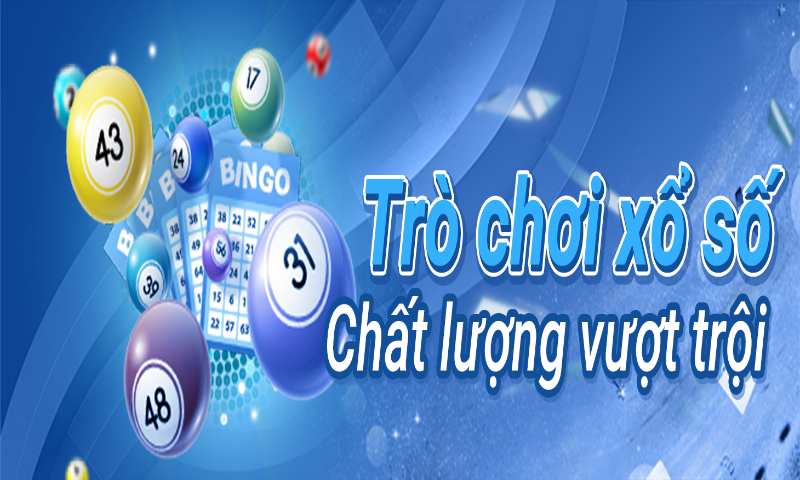
Sảnh cược xổ số lô đề 123bet cũng là một trong những địa chỉ mà các bạn nên ghé thăm. 123bet cung cấp dịch vụ giải trí trực tuyến với tỷ lệ thưởng cao. Các sản phẩm xổ số đặt cược nhanh chóng, an toàn và uy tín. Là địa chỉ giải trí hấp dẫn mọi cược thủ.
Sòng bạc trực tuyến
Sòng bạc trực tuyến 123bet là một trong những sảnh cược rất được các cược thủ yêu thích. Tại đây, bạn có thể thoả sức trải nghiệm các tựa game như: baccarat, sicbo, roulette, rồng hổ online,… Các trò chơi có tỷ lệ đổi thưởng hấp dẫn và dịch vụ thanh toánh linh hoạt.
>> Các sòng bạc trực tuyến uy tín: tdtc, viva88, hb88, vg99, dabet,…
Nổ hũ 123bet
Nổ hũ 123bet mang đến cho người chơi nhiều trải nghiệm hấp dẫn với các tựa game như: Sơn tinh thủy tinh, tam quốc tranh hùng, ăn khế trả vàng,… Ngoài ra, giải thưởng Jackpot lên đến hàng trăm triệu đồng cũng là một trong những cơ hội giúp bạn làm giàu thần tốc.
Cá cược trực tuyến là một trong những vấn đề được quan tâm nhất gần đây. Nhất là trong thời điểm mà công nghệ thông tin vô cùng phát triển, có rất nhiều nhà cái cá cược ra đời. Một trong số đó, chúng ta không thể không nhắc đến 123bet. Nhà cái được mệnh danh là thiên đường game cá cược với tỷ lệ trả thưởng hấp dẫn nhất. Tuy nhiên để có thể tham gia chơi cá cược tại nhà cái thì anh em cần nạp tiền vào 123bet. Vì vậy hôm nay, chúng tôi sẽ hướng dẫn nạp tiền 123bet hiệu quả nhất cho anh em.
Nổ hũ Onbet tuy là trò chơi mới vừa xuất hiện cách đây không lâu, thế nhưng đây lại chính là sân chơi được nhiều anh em lui tới nhiều nhất. Nguyên nhân chính là người chơi đến tham gia chính là dòng game nổ hũ này rất dễ chơi mang đến nhiều ưu điểm điển hình nhất phải kể đến cơ hội trúng lớn mà nhà cái onbet mang lại. Cùng tìm hiểu những ưu điểm đó là gì nhé!
Dòng game nổ hũ này được Onbet thiết kế xây dựng dựa vào nền tảng game truyền thống được cải tiến từ game slot với những dòng máy quay thưởng. Tuy nhiên đơn vị Onbet đã thay đổi để phù hợp với nhu cầu dành cho người chơi online.
Bên cạnh đó luật chơi của trò chơi này rất đơn giản, tạo thêm động lực để người chơi có thể tham gia trải nghiệm những tính năng tuyệt vời khi chơi tại sân chơi uy tín hàng đầu như Onbet. Điểm thật sự cuốn hút người chơi chính là chính sách khuyến mãi, hình thức thanh toán, nhận thưởng,….Đặc biệt hiện nay người chơi có thể tải app Onbet để truy cập và tham gia game nổ hũ dễ dàng hơn.
>> Xem thêm: Nhà cái cá cược casino online hot nhất: uw88, top88, m88, lode88, w88,…
Khám phá những ưu điểm tuyệt vời của dòng game nổ hũ Onbet
Khi anh em tham gia vào trò chơi này. chắc chắn 1 điều mà anh em sẽ nhận được chính là những phần thưởng cực kỳ giá trị. Bởi có rất nhiều những hũ thần tài đang đợi anh em cùng khám phá và tìm đến để nhận may mắn. Đặc biệt, trong dịp xuân về nhà cái Onbet còn mang đến nhiều niềm vui khi anh em tham gia vào không gian giải trí tuyệt đỉnh này.
Thiết kế đồ họa đẹp mắt trong game nổ hũ
Yếu tố để thu hút anh em tham gia game nổ hũ chính là hình ảnh được nhà cái Onbet được thiết kế đẹp mắt vô cùng chuyên nghiệp. Người chơi sẽ cảm nhận được rằng những hình ảnh này vô cùng gần gũi với anh em. Hơn thế nữa là luật chơi cũng tương tự như nhiều dòng game khác.
Các bước tham gia game nổ hũ Onbet vô cùng đơn giản
Dù là người chơi không rành về công nghệ thì cũng có thể tham gia giải trí ngay lập tức cùng với những thao tác nhanh chóng và cực kỳ đơn giản. Chỉ sau vài bước thực hiện việc đăng ký và nạp tiền vào là anh em có thể thoải mái tham gia đặt cược. Tại đây bạn sẽ có thể lựa chọn mức đặt cược khác nhau từ ít cho đến nhiều.
Nhà cái Onbet hỗ trợ người chơi nạp rút dễ dàng
Điểm được nhiều người chơi đánh giá cao đó chính là hệ thống nhà cái Onbet luôn hỗ trợ tất cả các anh em hình thức nạp rút cho người chơi. Ngoài ra, nhà cái này còn cung cấp nhiều hình thức nạp tiền đa dạng cho người chơi dễ dàng lựa chọn nhất.
Các khuyến mãi cùng tỷ lệ trả thưởng tại game nổ hũ Onbet cực hấp dẫn
Không thể không nhắc đến những phần quà hấp dẫn khi anh em nhận được tại trò chơi này. Hơn thế nữa là những ưu đãi khi tham gia tại nhà cái Onbet. Cơ hội mở kho báu, cơ hội nhận lượt quay miễn phí,… Tất cả đều thu hút người chơi với nhà cái Onbet để thử may mắn.
Những mẹo chơi nổ hũ Onbet mà anh em chắc chắn sẽ dành chiến thắng
Để người chơi dành chiến thắng là điều không quá khó khăn, tuy nhiên đừng vì thế mà nghĩ rằng luật chơi đơn giản thì bạn sẽ dễ trúng. Mỗi trò chơi đều sẽ có những mẹo cơ bản để anh em áp dụng và nổ hũ cũng vậy. Muốn giành phần thưởng thì anh em cần nắm rõ được những chiến thuật như sau:
Nên chọn phòng chơi phù hợp khi tham gia nổ hũ Onbet
Tại nhà cái Onbet sẽ thiết kế nhiều phòng với nhiều cấp độ level khác nhau để anh em lựa chọn ohf hợp với khả năng của mình. Không nên lựa chọn tham gia những phòng mà các cao thủ hay chơi vì bạn sẽ bị thua ngay lập tức.
Nắm rõ luật chơi là 1 trong những nguyên tắc quan trọng
Không nên chưa biết gì lại thể hiện rằng mình biết rất nhiều và tham gia ngay. Đầu tiên trước khi bắt đầu tham gia bạn cần phải nắm rõ được luật chơi cũng như các quy tắc chơi tránh gặp những sự cố không đáng có.
Không nên sử dụng chế độ tự động để quay hũ nhiều
Một trong những yếu tố nhiều anh em chưa biết đặc biệt là những người mới tham gia chính là lạ dụng chế độ tự động để quay hũ. Tuy nhiên điều này là không nên bởi sẽ tiêu tiền của bạn mà bạn khó kiểm soát được.
Người chơi nên quan sát và học hỏi ngay chỉ sau vài ván qua hũ là bạn đã có kinh nghiệm tích lũy nổ hũ. Điều này sẽ giúp cho bạn có được những kinh nghiệm cho riêng mình để áp dụng chơi game nổ hũ Onbet. Hoặc bạn có thể tham khảo thêm 1 số cách cả các tay cao thủ có nhiều kinh nghiệm áp dụng vào game nổ hũ để nâng cao lựa chọn được hủ đang nắm giữ phần thưởng trúng lớn.
Hình thức nạp tiền 123bet phổ biến
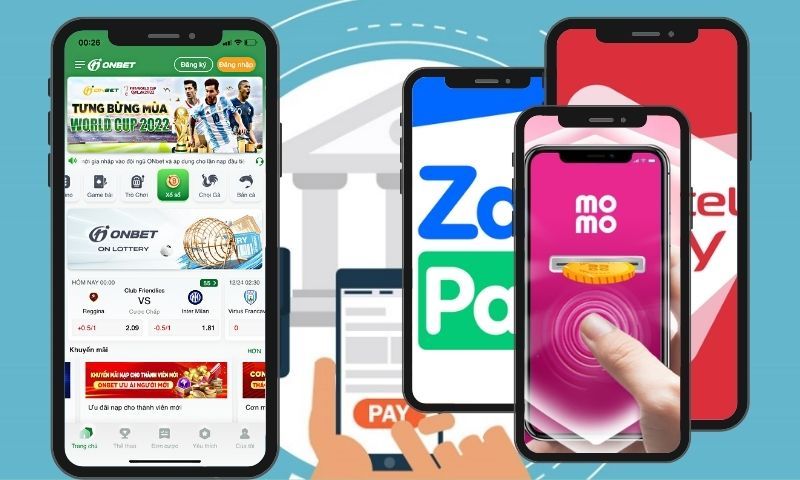
Với sự phát triển không ngừng của công nghệ thông tin, nhà cái 123bet cũng nâng cấp hệ thống nạp tiền của mình để giúp người chơi có thể dễ dàng thực hiện các giao dịch. Bên cạnh đó thì nhà cái cũng đã ra rất nhiều các hình thức nạp tiền để người chơi thoải mái lựa chọn. Các hình thức nạp tiền phổ biến nhất tại 123bet:
- Nạp tiền 123bet thông qua ngân hàng địa phương
- Nạp tiền 123bet bằng ví điện tử
- Nạp tiền 123bet thông qua Internet Banking
- Nạp tiền 123bet bằng thẻ cào điện thoại
Với mỗi hình thức nạp tiền sẽ có các ưu và nhược điểm. Vì vậy mà anh em có thể căn cứ vào đó để lựa chọn cho mình một hình thức nạp tiền vào nhà cái 123bet hiệu quả nhất, nhanh chóng nhất.

Hướng dẫn nạp tiền 123bet thành công 100%
Các thao tác để thực hiện giao dịch nạp tiền tại nhà cái 123bet vô cùng đơn giản mà bất kể anh em cược thủ nào cũng có thể thực hiện được. Nhưng không phải ai cũng có thể thực hiện nó một cách thuận lợi nhất. Dưới đây là hướng dẫn nạp tiền 123bet chi tiết nhất, anh em có thể tham khảo và áp dụng theo:
- Bước 1; Anh em cần truy cập vào nhà cái 123bet bằng đường link chính thống, an toàn để tránh bị lừa đỏa. Do nhà cái 123bet khá nổi tiếng nên xuất hiện khá nhiều địa chỉ giả mạo nhà cái, vì vậy anh em cần lưu ý nha.
- Bước 2: Tiếp đó, anh em hãy đăng nhập tài khoản cá cược của mình tài nhà cái. Nếu chưa có tài khoản thì anh em hãy thực hiện đăng ký theo các bước hướng dẫn, vô cùng đơn giản và nhanh chóng.

- Bước 3: Sau khi đăng nhập thành công thì hãy Click ngay vào mục “Nạp tiền” và chọn cho mình một hình thức nạp tiền hợp nhất với bản thân.
- Bước 4: Hệ thống của nhà cái 123bet sẽ gửi đến cho anh em một biểu mẫu và yêu cầu các anh em điền thông tin của mình. Các thông tin có thể là tên đăng nhập, số điện thoại, số tài khoản,…. tùy vào hình thức mà anh em lựa chọn thì các thông tin yêu cầu sẽ khác nhau.
- Bước 5: Cuối cùng là anh em nhập số tiền mà mình muốn nạp và nhấn xác nhận để hoàn tất quá trình.
Chỉ với 5 bước cơ bản là anh em có thể hoàn thành giao dịch nạp tiền tại nhà cái 123bet. Nhiệm vụ bây giờ của anh em là chờ đợi nhà cái xác nhận thông tin và gửi thông báo nạp tiền thành công. Sau khi nạp tiền thành công thì anh em có thể truy cập vào nhà cái để trải nghiệm kho game cá cược và nhận thưởng lớn ngay thôi.
Lưu ý khi thực hiện giao dịch nạp tiền 123bet
Để giao dịch nạp tiền tại nhà cái 123bet được diễn ra nhanh chóng và thành công 100% thì anh em cần lưu ý một số vấn đề sau:
- Tất cả các giao dịch nạp tiền tại nhà cái đều hoàn toàn miễn phí. Vì vậy mà khi thực hiện giao dịch có yêu cầu trả phí thì anh em hãy dừng lại ngay và từ chối thực hiện các giao dịch đó. Bởi đây chính là một trong những chiêu trò lừa đảo.
- Anh em nên tìm hiểu kỹ về các quy định, điều khoản mà nhà cái 123bet đưa ra để thực hiện và làm theo, tránh mắc phải những sai lầm.
- Mỗi hình thức nạp tiền tại nhà cái 123bet sẽ quy định các mức tối đa và tối thiểu khác nhau. Vì vậy mà anh em cần tìm hiểu kỹ hình thức nạp tiền mà mình lựa chọn nha.
- Để có thể nạp tiền thành công 100% thì trước hết, anh em cần điền các thông tin một cách chính xác nhất. Chỉ cần sai một số hay một chữ, một cú pháp thì giao dịch đều sẽ bị từ chối.
- Trước khi thực hiện giao dịch nạp tiền thì cần kết nối cho thiết bị của anh em mạng internet có tốc độ đường truyền ổn định để tránh bị gián đoạn trong quá trình nạp do nghẽn mạng.
Trong quá trình thực hiện giao dịch nạp tiền tạo nhà cái, nếu anh em có gặp bất cứ vấn đề hay khó khăn gì thì có thể liên hệ đội ngũ nhân viên chăm sóc khách hàng của nhà cái để nhận được sự hỗ trợ tận tình và nhanh chóng nhất nha.
Lý do nhà cái 123bet lan truyền thông tin lừa đảo
Nhà cái 123bet được thành lập vào năm 2012 với hệ thống trò chơi đa dạng. Đây là đơn vị chuyên cung cấp các dịch vụ chơi game đổi thưởng online chất lượng nhất. Họ thu hút hàng trăm anh em đặt cược mỗi ngày.
Bằng những ưu đãi, tính năng vượt trội và đầu tư bài bản nên sân chơi này nhanh chóng có được tiếng vang lớn. Ngay từ khi mới ra mắt, nhà cái đã trở nên nổi bật và trở thành sân chơi độc quyền. Sau 3 năm chào sân quốc tế, 123bet đã thu hút rất nhiều anh em cược thủ.
Đương nhiên để có thành công vang dội như ngày hôm nay 123bet đã luôn cố gắng và làm việc hết mình. Họ không ngừng sáng tạo và đổi mới để phù hợp với nhu cầu của người chơi. Đôi khi có vài tin đồn không hay về nhà cái nhưng đều không là gì cả. 123bet vẫn tự tin khi có chỗ dựa vững chắc với người hâm mộ.
Đột nhiên khi xuất hiện một vài thông tin 123bet lừa đảo khiến khá nhiều người chơi lo lắng. Cụ thể những lý do tạo nên nguồn cơn của câu chuyện đó là:
Bị đối thủ chơi xấu
Trên thị trường hiện nay có vô số nhà cái trực tuyến khác nhau. Cùng nghĩa với đó là vẫn có sự tồn tại của những nhà cái chơi không lành mạnh. Họ sẵn sàng sử dụng những chiêu trò khác nhau để nói xấu đối thủ. Mục đích của họ nhằm hạ thấp uy tín và kéo người chơi về phía họ.
Đặc biệt hơn, thời điểm bấy giờ 123bet cực được ưa chuộng, người chơi cứ nườm nượp dồn về 123bet. Khiến cho các đối thủ có cảm giác ghen ăn tức ở. Họ chỉ muốn hình tượng của nhà cái 123bet bị hạ bệ trong cái nhìn của quý thành viên.
Người chơi bị khóa tài khoản
Có đôi lúc tài khoản của thành viên bị khóa mà không rõ lý do. Người chơi không thể nào truy cập được và mất tiền trong tài khoản. Do đó cược thủ ngay lập tức nghĩ tới trường hợp 123bet đang lừa đảo tiền nạp vào. Trong tình huống này, bạn cần nhờ tới sự giúp đỡ của hệ thống. Thiết bị sẽ kiểm tra và phát hiện ra lỗi mà bạn đang mắc phải.
Thực chất nguyên nhân của việc này link có vấn đề do mạng. Bạn có thể thử lại 1 tới 2 lần nữa để vào game và chơi được bình thường. Còn nếu như tài khoản bị khóa tức là do hệ thống đã phát hiện hành vi gian lận từ tài khoản.
Không giao dịch được tiền trong tài khoản
Người chơi không thể nạp tiền hoặc giao dịch đổi thưởng tại tài khoản có nhiều lý do. Chỉ cần anh em không tìm sợ trợ giúp của nhân viên chăm sóc khách đã nghĩ ngay tới lừa đảo. Trước hết khi gặp vấn đề đó cần phải xem lại có phải do mạng không. Cũng có thể thiếu một bước nào đó trong thông tin trên hệ thống.
Trong trường hợp nếu không giải quyết được hãy liên hệ ngay với nhân viên tổng đài tại website để được hỗ trợ. Bạn cũng có thể gọi vào đường dây nóng của nhà cái 123bet để được giải quyết nhé.
Đánh giá của cược thủ về độ uy tín của 123bet
Với kinh nghiệm dày dặn lâu năm trong khâu quản lý cùng nguồn vốn hùng hậu. Có thể nói 123bet là nhà cái cá cược online sở hữu độ an toàn và uy tín cao cho anh em. Thông thường các anh em cược thủ đã gắn bó lâu với 123bet sẽ hiểu rõ điều này. Những thông tin này đều do chính các cược thủ xác nhận.
Nhà cái đã đăng ký hợp pháp tại tổ chức cá cược lớn trên thị trường. Bởi vậy nên đảm bảo độ uy tín cho người chơi. Hơn nữa với sự điều này chuyên nghiệp của đội ngũ IT đầy kinh nghiệm. Đây thực sự là một thiên đường game trực tuyến mà game thủ nên trải nghiệm.

Chế độ nạp rút cũng như đăng ký tài khoản được giải quyết nhanh chóng. Người chơi thỏa sức tham gia các dịch vụ cá cược hấp dẫn. Chế độ trả thưởng được trả linh hoạt theo các hoạt động của khách hàng. Do đó, số lượng người tham gia các dịch vụ tại cơ sở tăng nhanh chóng. Với tiến độ này, không lâu nữa, đơn vị sẽ là địa điểm thú vị được nhiều người lựa chọn.
Lời kết
Trên đây là toàn bộ thông tin về hướng dẫn nạp tiền 123bet chi tiết nhất mà chúng tôi muốn chia sẻ với anh em. Hy vọng những thông tin mà chúng tôi mang đến sẽ giúp anh em thực hiện quá trình nạp tiền tại nhà cái 123bet một cách thuận lợi nhất. Còn chần chừ gì mà không nạp tiền vào nhà cái 123bet để có thể trải nghiệm kho game cá cược và nhận thưởng lớn ngay thôi nào.
Và đó là những thông tin sơ lược về nhà cái 123bet – địa chỉ giải trí trực tuyến hàng đầu Việt Nam. Để tận hưởng những dịch vụ đẳng cấp tại đây, người chơi hãy nhanh tay đăng ký tham gia và trải nghiệm. Chúc bạn thành công.